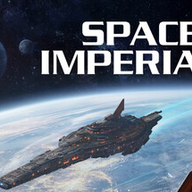
Space Imperia 4X Exploration Guide
Explore Space Imperia 4X safely with scouts, cruisers, deep-space hazards, minerals, wrecks, and route planning.
Exploration in Space Imperia 4X is a risk budget. The official site describes a galaxy with habitable worlds, alien planets, asteroids, nebulae, warp points, and other terrain features, while the Steam page adds harvestable minerals, derelict ship wrecks, Deep Space rewards, and Black Holes. The same public technology description connects Exploration to Cruisers that can discover adjacent systems without movement. A player should not reveal systems merely because fog exists. Reveal the systems that answer the next practical question: where can I colonize, where can the enemy approach, which lane hides a reward, and which hazard would punish a blind fleet?
The best early exploration plan is conservative but not passive. Use scouts to turn nearby unknowns into colony and defense decisions. Use cruisers with Exploration-related sensor tools when public evidence says adjacent-system discovery can be done without movement. Treat deep space as both opportunity and danger. A wreck or mineral source can speed the economy, but the same route may expose a colony ship, miner, or future assault group. Good exploration tells the economy and fleet what to do next.
Reveal Nearby Space First
The first systems to reveal are the ones that affect your home world and first colonies. A nearby habitable world can justify a colony ship and support fleet. A nearby approach lane can require an escort or combat research. A nearby hazard can close an easy-looking path and force a safer route around it. Exploration is valuable because it removes bad assumptions before the research/build turn, not because every revealed tile is automatically profitable.
Write down the reason for each scout move before committing. "Reveal the adjacent system east of home because it controls the colony ship route" is a useful order. "Send a scout outward because exploration is good" is too vague. Space Imperia 4X matches are described as one to two hours, so a scout that spends several turns answering the wrong question can delay the colony, income, or attack timing that wins the game.
| Scout target | What it can answer | Likely follow-up |
|---|---|---|
| Adjacent home system | Is the home-world approach safe? | Escort, sensor, or defensive fleet. |
| Habitable world route | Can a colony ship travel safely? | Colony ship plus support movement. |
| Deep-space entrance | Is the shortcut worth the danger? | Continue only with recovery options. |
Deep Space Is Not Free Space
The official descriptions frame deep space as a place where risk and reward must be balanced. That language matters. Do not send a valuable fleet into deep space only because it might shorten the path to a rival home world. First decide what failure looks like. If a black hole, enemy contact, or bad terrain reveal would strand the plan, use a scout or sensor step before committing heavier ships. If a mineral or wreck reward would immediately fund a needed technology or ship, the risk may be worth taking.
Deep space also changes timing. A shortcut can make a home-world assault realistic earlier than expected, but it can also create a lane that you must defend for the rest of the match. Before opening such a route, ask whether your economy can support the ships needed to hold it. If not, reveal around it, mark the risk, and spend the next production turn on the tool that makes the lane usable.
| Deep-space result | Why it matters | Player response |
|---|---|---|
| Black hole or hazard | Can destroy or block a careless plan | Scout first; move key fleets only after confirmation. |
| Minerals or wreck | Can change the next economy decision | Take when the route can be protected. |
| Warp point or lane | May shorten the path to enemies | Secure both ends before treating it as safe. |
Colonization Depends On What You Reveal
Exploration and colonization are inseparable. The official site confirms normal habitable worlds, barren planets needing Terraforming, and alien planets requiring military action. A beginner-friendly rule is to colonize what your current economy and fleet can support. Normal habitable worlds near a protected lane usually come first. Barren planets become attractive when Terraforming is part of the research plan. Alien planets need a combat plan because clearing them consumes ships or time that might otherwise protect the home world.
Do not rank worlds only by imagined long-term value. Rank them by how quickly they strengthen a route. A colony that helps protect miners or extends a push toward a rival home world may be better than a distant world with a higher theoretical payoff. A colony ship sent through unknown space is not an economy play until the route has been checked. If the route is unclear, spend a scout move first and accept the delay.
Good exploration notes name the planet, route, required support, and next spend. For example, a habitable world near home might require a colony ship and one escort. A barren planet might require delayed Terraforming and a later settlement window. An alien planet might require military action after a safer economy is established. These notes keep the colony plan tied to evidence instead of hope.
Using Sensors And Cruisers
The Steam description states that Exploration lets cruisers equip advanced sensors to discover adjacent systems without movement. That gives exploration a specific technology question: is the next unknown important enough to justify safer information? If an adjacent reveal could identify a black hole before a valuable fleet enters, sensors can preserve tempo. If the reveal only satisfies curiosity far from the main routes, a cheaper scout action may be enough.
Sensors are also useful when enemy contact risk is uncertain. Concealed combat ships reveal at first contact, so knowing what terrain and routes sit near the border can change fleet movement before the battle happens. A sensor-supported cruiser should be used where information affects a colony, miner, fleet, or home-world lane. It should not drift around the map without a linked production decision.
| Information tool | Best use | Avoid using it for |
|---|---|---|
| Scout | Cheap reveal of nearby route or colony question | Blind pushes with no follow-up plan. |
| Cruiser sensors | Adjacent-system checks before risky movement | Curiosity reveals far from the active front. |
| Fleet probe | Testing a route that may become an attack lane | Replacing real scouting with expensive exposure. |
Exploration Under Enemy Pressure
Exploration becomes harder after contact because every reveal may expose both opportunity and danger. If you see evidence of raiders, remember that the Steam page describes them as cloaked but ineffective in nebulae and countered by destroyers with scanners. If fighter or carrier pressure appears, scouts with Point Defense become more relevant. If larger hulls are expected, mines and terrain can change how safe a lane really is. These combat facts belong in an exploration guide because map routes decide where first contact happens.
When enemy pressure is close, stop treating scouts as disposable fog clearers. Use them to answer specific questions: can a colony ship move, can a miner survive, can the fleet avoid a bad first contact, and can the route toward the rival home world stay open? If a scout dies after answering one of those questions, the loss may be acceptable. If it dies without changing a decision, the route was probably too vague.
Turning Reveals Into A Win Path
Every exploration plan should eventually point toward the win condition. The official source says the goal is eliminating rival home worlds, so exploration that never produces a route, economy, or combat advantage is incomplete. Once you have enough local safety, identify which revealed systems lead toward an enemy. Then decide what the route needs: colonization for staging, miners for funding, sensors for safety, or fleets for pressure.
Keep two maps in your head. The first is the safe map: home systems, settled worlds, protected income, and known hazards. The second is the attack map: deep-space shortcuts, warp points, contested lanes, and enemy approach routes. Strong Space Imperia 4X play connects the two. The safe map funds the attack map; the attack map gives the safe economy a reason to exist.
Exploration FAQ
What should I reveal first? Reveal systems that affect home-world safety, first colonies, income routes, or a possible rival home-world path.
Are deep-space rewards always worth it? No. Minerals and wrecks can help, but hazards and exposure can make a blind route too expensive.
When should I use cruiser sensors? Use them when adjacent-system information prevents a risky movement or changes the next production decision.
How does exploration win games? It finds safe income, colony routes, and attack lanes that let your fleet reach rival home worlds.